I started this blog a week ago and it’s actually my 3rd blog I created. I created my first blog around 2010 as self hosted wordpress website. Then when doing more Azure stuff I wanted to start of with a clean cheat again and created a new blog in 2016 using Wordpress again but then hosted on Azure https://mobilefirstcloudfirst.net. This worked but I was never happy with it. The last 2 years I didn’t blog at all so when I started with my new years resolution of blogging again I decided I needed a new blog, new domain name and something that used markdown for editing.
Choosing Hugo
I chose Hugo after looking into some of the common blogging platforms that are based on static site generators such as Jekyll and Hugo. After browsing through some of the themes and did some comparison I decided to try out Hugo since it looked more popular and just wanted to see how ard it was.
![]()
A couple of hours later the website was up and running on my machine and I was already tweaking away at some UI improvements.. Point proven lets see what I needed to do.
My blog using Hugo hosted on Github Pages, what is in the box?
I wanted to create a blog website that was based on markdown files that i could store in git. I already had some experience with GitHub Pages so I though lets see how hard that is. After a couple of hours I had the followng up and running:
- Hugo CMS
- Finding a theme
- Algolia Search
- GitHub Pages for hosting
- Github discussions for comments using Giscuss
- Automatically deploy using Github Pages
Hugo CMS
The Hugo CMS was quite easy. I just followed the tutorial on the Hugo website to create a new empty website. It took me a couple of minutes.
Adding a Theme
Hugo has a list of themes on it’s website. The Clean White Hugo Theme looked quited good so I gave that a go. What I looked for in a theme was a nice clean interface and options for comments + search. This team had it all so I just installed it as a git submodule and when I ran the hugo serve command it was working from the get go
mkdir themes
git submodule add https://github.com/zhaohuabing/hugo-theme-cleanwhite.git themes/hugo-theme-cleanwhite
After my initial playing around with setting up the website I wanted to customize some things so what i did was that I actually forked the github repo and made the changes on my fork. All my changes are open source and can be found on this repo
Changes that I made are:
- Showing blog preview / full posts in the homepage instead of the really small summaries.
- Added headers to the blog preview using images
- Added an option to show banners on the sidebar.
- Some small css tweaks
- Added full posts to the RSS Feed instead of the summary
- Fixed some issues in the algolia search json that was being generated
All these changes were quite simple without me knowing anything about Hugo, themes or GO templating.
Algolia Search
Hugo does not have support for search out of the box by itself. Luckely the theme I chose had this covered and supported search by a free 3rd party service. The only thing that was needed was creating an account and set up the API key and create an index.
![]()
Algolia works with sending json files to the index. The json files are generated during compilation of the Hugo website and this json can then be uploaded on the website of Algolia for a first test. This manual labor is not something I would prefer so I automated this in the next step where I also deploy everything to Github Pages.
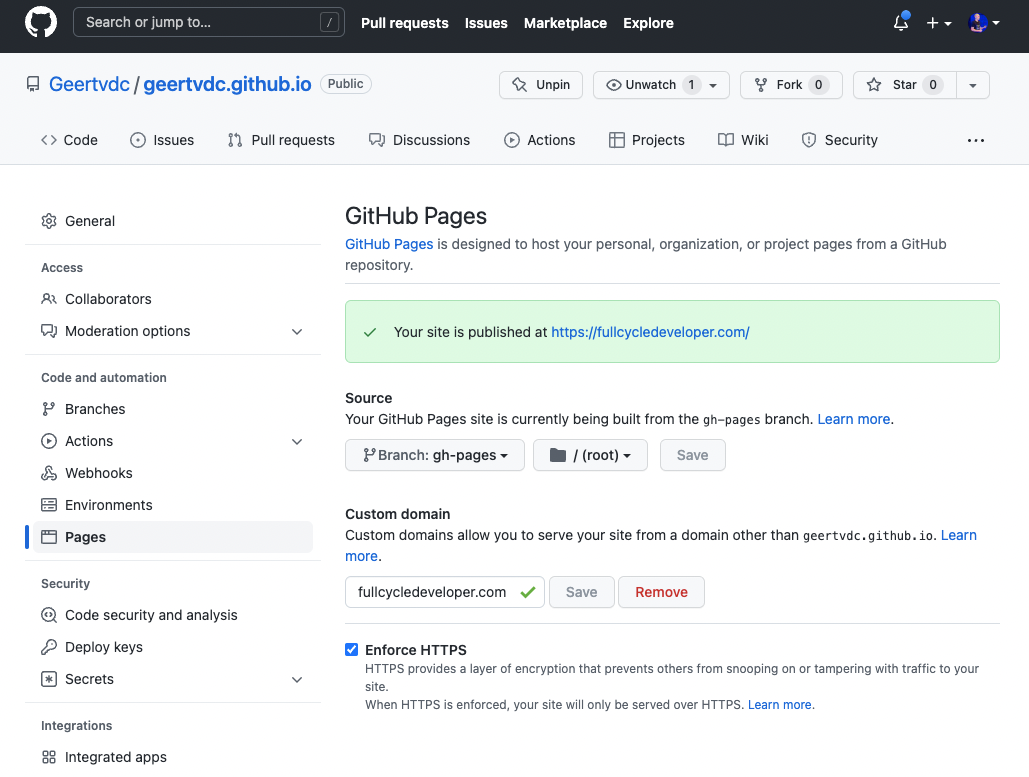
Deploying every commit to Github Pages and host it on my custom domain
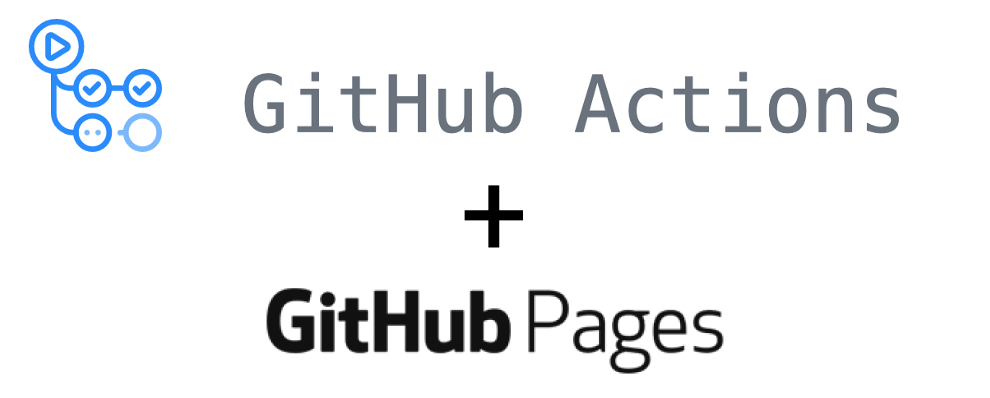
I’m a developer so I wanted a fully automated workflow. My content is stored in a git repo on Github and I wanted that every commit I made to main would be automatically deployed to the website.
GitHub offers this flow with no effort for Jekyll but for HUGO some small additions needed to be done. Before we create our workflow we need to add a specific file to our repo called CNAME so github pages links this page to our custom domain.
CNAME File
When you change the domain name for your website hosted using GitHub pages Github automatically creates a commit with a CNAME file in it. This file is used by GitHub to know which domain name is used for the website. Since my workflow was pushing all contents of the ./public folder GitHub was actually removing this file every time after the Hugo workflow ran. Manually adding the CNAME file to the static folder helped solve this issue.
My CNAME file content:
fullcycledeveloper.com
Now that everything is ready we can create our workflow file. My file looks like this, The steps are quite self explanatory but I’ve added some comments below each action to explain what I’m doing.
name: github pages # Name of the workflow

on:
  push:
    branches:
      - main
  pull_request:

jobs:
  build:
    runs-on: ubuntu-latest
    defaults:
      run:
        working-directory: blog
    steps:
      - uses: actions/checkout@v2
        with:
          submodules: true  # Fetch Hugo themes (true OR recursive)
          fetch-depth: 0    # Fetch all history for .GitInfo and .Lastmod

      - name: Setup Hugo
        uses: peaceiris/actions-hugo@v2
        with:
          hugo-version: 'latest'
        # Downloads & installs HUGO cli

      - name: Build
        run: hugo --minify
        # Do a HUGO build of your markdown files to generate a stetic website that is stored in the `./public` folder

      - name: Deploy
        uses: peaceiris/actions-gh-pages@v3
        if: github.ref == 'refs/heads/main'
        with:
          github_token: ${{ secrets.GITHUB_TOKEN }}
          publish_dir: ./blog/public
        # takes the public folder and pushes the changes to a new branch called gh-pages

      - uses: wangchucheng/algolia-uploader@master
        with:
          app_id: 9AWS4CUHVW
          admin_key: ${{ secrets.ALGOLIA_ADMIN_KEY }}
          index_name: fullcycledeveloper-blog
          index_file_path: ./blog/public/algolia.json
        # Uploads the algolia json file to the index on algolia website
After each commit the generated website is pushed to the gh-pages branch. From here we can enable Github Pages in the Settings menu of the repository. Point it to the right branch and connect the domain name that you specified in the CNAME file. You’ll have to do some DNS settings to make sure you are the actual owner of that domain and voila your website is ready to go!
Adding comments to the posts using Giscuss (based on Github Discussions)
A static website by default is just static.. That is ok for most scenarios but for a blog I wanted to add comments to the posts. I used Giscuss to do that. The Hugo Theme I used (Clean White Hugo Theme ) has built in support for multiple comment systems. Since my main target audience is developers I chose Giscuss as the comment system.
The only thing i needed to do is set the properties to the right Github Discussions space in my configuration .toml file.
[params.giscus]
  data_repo="geertvdc/geertvdc.github.io"
  data_repo_id="<REPO_ID>"
  data_category="blog-comments"
  data_category_id="<CATEGORY_ID>"
  data_mapping="blog"
  data_reactions_enabled="1"
  data_emit_metadata="0"
  data_theme="light"
  data_lang="en"
  crossorigin="anonymous"
After doing that it just works! I didn’t have to sign up for any new platform since my code is already on Github and now everything is in the same place.
Hopefully this helps people set up a simple blog website as well. I’m really happy in how it turned out and it really was a breeze to set it up.
Happy Blogging!
Geert van der Cruijsen